webpack 튜토리얼 - 설정 및 사용법

1. 개요

  • webpack을 설치하고, 실습 편의를 위한 webpack.config.js 설정
  • webpack을 설정한 프로젝트를 build하고 build결과를 통해 webpack의 사용의의를 확인한다


2. Webpack이란?

2.1 Why webpack?

  • 프로젝트가 성장함에 따라 프로젝트가 다루는 코드량은 많아지기 마련
  • 한 파일에 작성된 코드는 유지보수 관점에서 치명적

2.1.1 Progressive Enhancement(점진적 향상)

  • 점진적 향상관점에서도 파일을 분리하여, 유지보수를 용이하게 하고, 점진적으로 기능을 확대해가며 개발하는 것이 필요

2.1.2 Solution : Using Module

  • js진영 module 문법의 등장
  • 증가하는 코드 양을 기능별로 분리해 Module화

2.1.3 Trap

  • 파일의 분리 -> 브라우저의 http 요청수 증가
  • 웹 사이트의 성능 저하로 이어짐

2.1.4 Solution : webpack

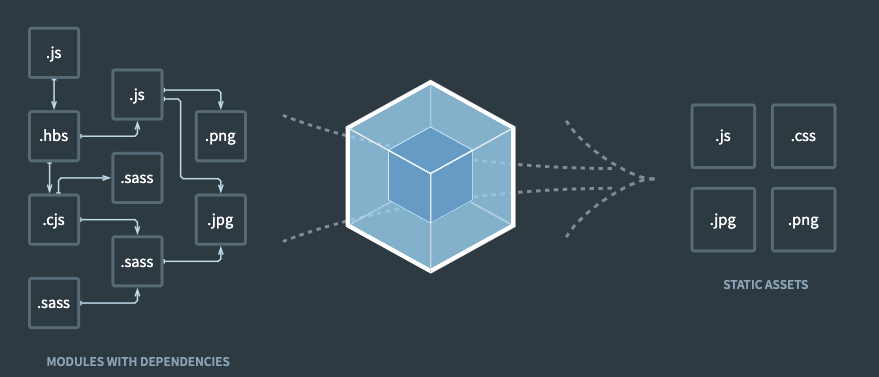
  • webpack : module bundler
  • webpack을 이용해, 프로젝트를 배포하기 전 적절한 bundling을 통해 웹 사이트의 성능 최적화

3. workflow

해당 Section에서는 프로젝트에 webpack을 설정하는데, 기본이라고 생각되는 부분을 기반으로 작성되었습니다.

추가 자세한 사항은 하단의 YouTube영상 시청을 권장드립니다.

3.0 사전준비, entry & dependency graph

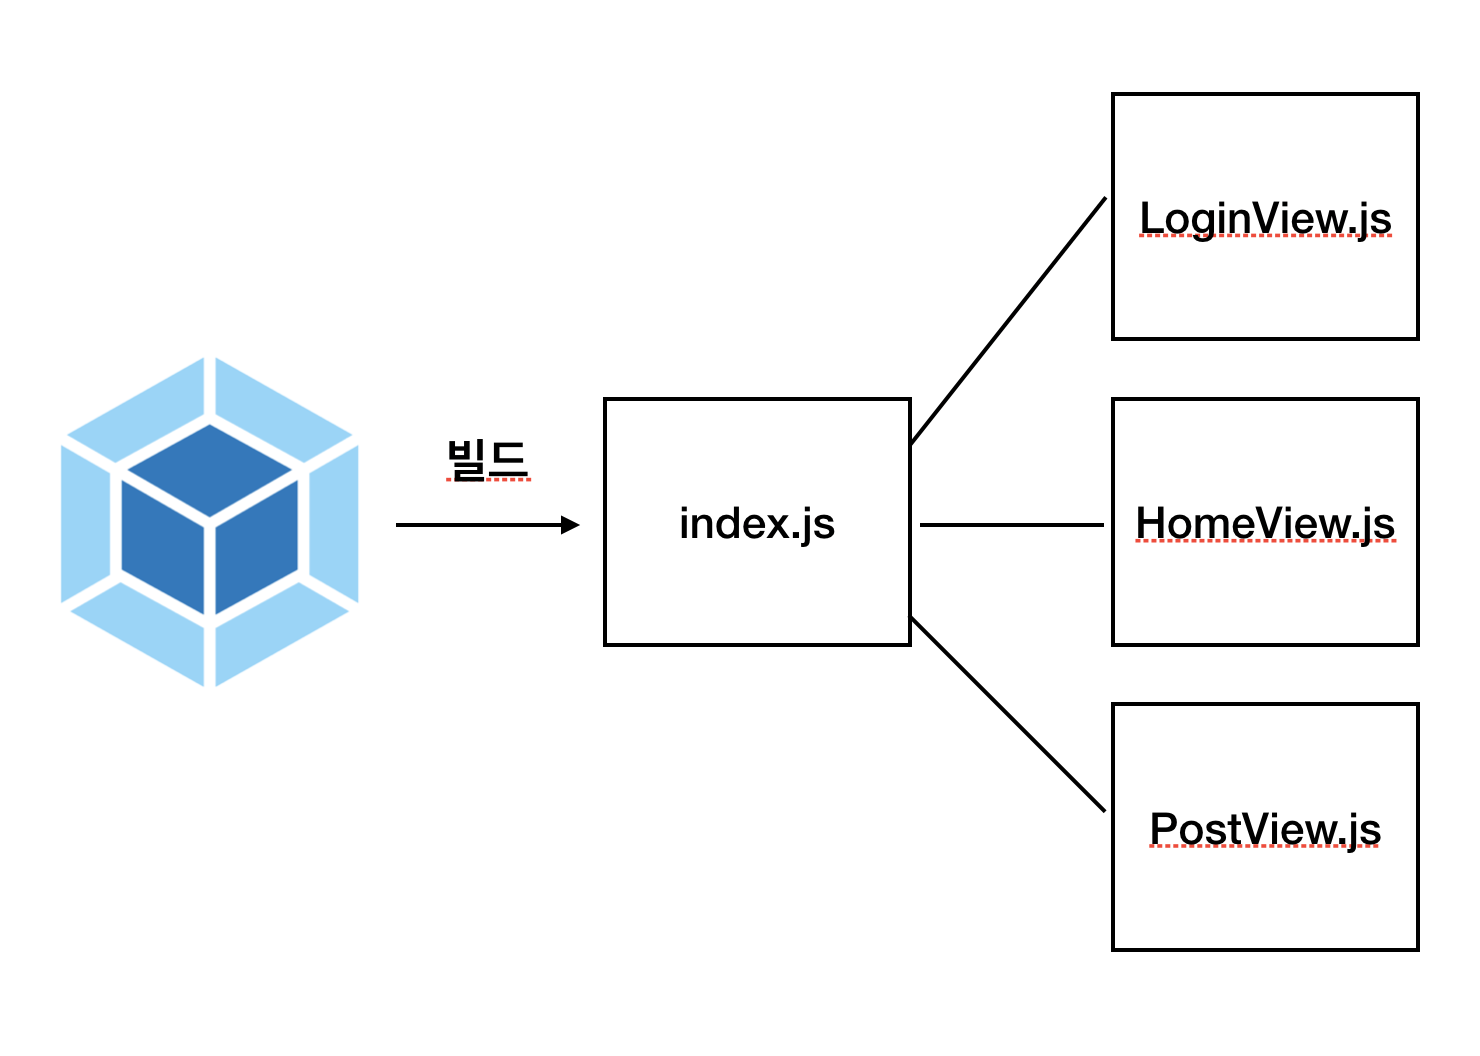
  • 기본적으로 webpack을 이용한 bundlig을 위해, webpack은 bundling의 시작점이 될 entry파일을 알아야 합니다.
  • 그리고 프로젝트에서 사용될 파일들은 entry파일을 시작으로 module의 의존관계가 명시되어 있어야 합니다.
출처 : 웹팩 핸드북

  • 저희는 프로젝트 root에 app.js를 entry 파일로 지정하고 실습을 진행하였습니다.
  • 의존관계를 트리형태로 나타내면 다음과 같습니다.
1
2
3
4
5
app.js
├── index.js
│ └── helper.js
└── style.css
└── animation.css

ex) app.js

1
2
3
4
import { init } from "./js/index.js";
import Style from "./css/style.css";

init()

3.1 npm init & install webpack

  • webpack을 install하기 위해 npm 환경을 구성
    1
    2
    $ npm init -y       # 빠른 진행을 우한 모든 option "yes"
    $ npm install webpack webpack-cli

3.2 webpack 사용법 (bundling js)

3.2.1 기본 사용법

1
2
# Damn... too long to type...
$ node_modules/.bin/webpack --mode development --entry ./app.js -o dist
  • 매번 작성하기엔 무리가 있는 command
  • 사용시마다 option을 숙지하지 않으면 사용하기 힘듦
node_modules/.bin/webpack --help
1
2
3
4
5
6
7
8
9
10
11
12
13
14
15
16
17
18
19
20
21
22
23
24
25
26
27
28
29
30
31
32
33
34
35
36
37
38
39
40
41
42
43
44
45
46
47
48
Usage: webpack [entries...] [options]
Alternative usage to run commands: webpack [command] [options]

The build tool for modern web applications.

Options:
-c, --config <value...> Provide path to a webpack configuration file e.g. ./webpack.config.js.
--config-name <value...> Name of the configuration to use.
-m, --merge Merge two or more configurations using 'webpack-merge'.
--env <value...> Environment passed to the configuration when it is a function.
--node-env <value> Sets process.env.NODE_ENV to the specified value.
--progress [value] Print compilation progress during build.
-j, --json [value] Prints result as JSON or store it in a file.
-d, --devtool <value> Determine source maps to use.
--no-devtool Do not generate source maps.
--entry <value...> The entry point(s) of your application e.g. ./src/main.js.
--mode <value> Defines the mode to pass to webpack.
--name <value> Name of the configuration. Used when loading multiple configurations.
-o, --output-path <value> Output location of the file generated by webpack e.g. ./dist/.
--stats [value] It instructs webpack on how to treat the stats e.g. verbose.
--no-stats Disable stats output.
-t, --target <value...> Sets the build target e.g. node.
--no-target Negative 'target' option.
-w, --watch Watch for files changes.
--no-watch Do not watch for file changes.
--watch-options-stdin Stop watching when stdin stream has ended.
--no-watch-options-stdin Do not stop watching when stdin stream has ended.

Global options:
--color Enable colors on console.
--no-color Disable colors on console.
-v, --version Output the version number of 'webpack', 'webpack-cli' and 'webpack-dev-server' and commands.
-h, --help [verbose] Display help for commands and options.

Commands:
build|bundle|b [entries...] [options] Run webpack (default command, can be omitted).
configtest|t [config-path] Validate a webpack configuration.
help|h [command] [option] Display help for commands and options.
info|i [options] Outputs information about your system.
serve|server|s [entries...] Run the webpack dev server. To see all available options you need to install 'webpack-dev-server'.
version|v [commands...] Output the version number of 'webpack', 'webpack-cli' and 'webpack-dev-server' and commands.
watch|w [entries...] [options] Run webpack and watch for files changes.

To see list of all supported commands and options run 'webpack --help=verbose'.

Webpack documentation: https://webpack.js.org/.
CLI documentation: https://webpack.js.org/api/cli/.
Made with ♥ by the webpack team.

3.2.2 using alias script

package.json

1
2
3
4
"scripts": {
// ...
"build": "webpack"
},

bash

1
2
3
4
5
# Awesome
# Finally, we can using with one-line command!
$ npm run build

# But, npm doens't know about option and extra configures

3.2.3 webpack.config.js

  • build를 하기전 npm은 webpack이란 명령어에서 무슨 option을 가지고 어떤 구성으로 커맨드를 수행할지 모른다
  • webpack.config.js이란 설명서를 제공해준다
1
2
3
4
5
6
7
8
9
10
11
12
const path = require('path');

module.exports = {
entry: './app.js', // entry file
output: {
filename: 'main.js', // output .js file name
path: path.resolve(__dirname, './dist'), // output is positioned in this directory
publicPath: '',
},
mode: 'production', // select build mode
optimization: { minimizer: [] },
}

3.2.4 output


3.3 bundling css

bash

1
$ npm i css-loader style-loader

webpack.config.js

1
2
3
4
5
6
7
8
9
10
11
12
13
14
15
16
17
18
19
20
// ...
module.exports = {
// ...
module: {
rules: [
{
test: /\.css$/i,
use: [
'style-loader',
{
loader: 'css-loader',
options: {
sourceMap: true,
},
},
]
},
],
},
}

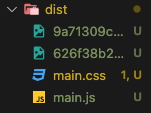
3.3.1 output css bundling

  • 그대로…?
  • js내에 포함되어 bundling, css에 포함된 이미지가 결과에 추가됨

3.3.2 MiniCssExtractPlugin

  • css bundling결과를 별도의 css파일로 분리한다.

bash

1
$ npm i mini-css-extract-plugin

webpack.config.js

1
2
3
4
5
6
7
8
9
10
11
12
13
14
15
16
17
18
19
20
21
22
23
24
25
26
// ...
const MiniCssExtractPlugin = require("mini-css-extract-plugin");
// ...
module.exports = {
// ...
module: {
rules: [
{
// ...
use: [
// ...
{
loader: MiniCssExtractPlugin.loader,
options: {
esModule: false,
},
},
// ,,,
]
},
],
},
plugins: [
new MiniCssExtractPlugin({ filename: 'main.css' }),
],
}

3.3.3 output


3.4 Additional Plugins

3.4.1 postcss, autoprefixer

  • postcss?

    • js기반으로 구성된 css의 Superset
    • css를 구성에 용이성을 더해줄 다양한 플러그인을 가진 tool
  • Autoprefixer

    • 브라우저 호환성을 위한 prefixer를 자동으로 추가하여, build하는 plugin

3.4.2 etc

  • CleanWebpackPlugin : 빌드 시 기존 빌드 output 디렉토리의 내용을 지워, 새 build 파일들만 존재하도록 하는 plugin
  • HtmlWebpackPlugin : 번들링 시, html 파일을 생성하도록 하거나, 지정한 템플릿 html을 제공할 수 있도록 하는 plugin
  • BannerPlugin : 번들링된 파일의 상단에 배너 텍스트를 추가해주는 plugin
  • DefinePlugin : 프로젝트내 모든 js코드에서 접근 가능한 전역 변수를 선언하기 위한 plugin


4. 소스코드

package.json

1
2
3
4
5
6
7
8
9
10
11
12
13
14
15
16
17
18
19
20
21
22
{
// ...
"scripts": {
// ...
"build": "webpack"
},
// ...
"dependencies": {
"autoprefixer": "^10.3.1",
"clean-webpack-plugin": "^4.0.0-alpha.0",
"css-loader": "^6.2.0",
"html-webpack-plugin": "^5.3.2",
"mini-css-extract-plugin": "^2.2.0",
"postcss": "^8.3.6",
"postcss-cli": "^8.3.1",
"postcss-loader": "^6.1.1",
"postcss-preset-env": "^6.7.0",
"style-loader": "^3.2.1",
"webpack": "^5.51.1",
"webpack-cli": "^4.8.0"
}
}

webpack.config.js

1
2
3
4
5
6
7
8
9
10
11
12
13
14
15
16
17
18
19
20
21
22
23
24
25
26
27
28
29
30
31
32
33
34
35
36
37
38
39
40
41
42
43
44
45
46
47
48
49
50
51
52
53
54
55
56
57
58
59
60
61
62
63
64
65
66
const path = require('path');
const MiniCssExtractPlugin = require("mini-css-extract-plugin");
const { CleanWebpackPlugin } = require('clean-webpack-plugin');
const HtmlWebpackPlugin = require('html-webpack-plugin');
const webpack = require("webpack");
const childProcess = require("child_process");
const removeNewLine = buffer => {
return buffer.toString().replace("\n", "")
}

module.exports = {
entry: './app.js',
output: {
filename: 'main.js',
path: path.resolve(__dirname, './dist'),
publicPath: '',
},
mode: 'production',
optimization: { minimizer: [] },
module: {
rules: [
{
test: /\.css$/i,
use: [
'style-loader',
{
loader: MiniCssExtractPlugin.loader,
options: {
esModule: false,
},
},
{
loader: 'css-loader',
options: {
sourceMap: true,
},
},
'postcss-loader',
]
},
],
},
plugins: [
new MiniCssExtractPlugin({ filename: 'main.css' }),
new CleanWebpackPlugin(),
new HtmlWebpackPlugin({ template: 'index.html' }),
new webpack.DefinePlugin({
APP_NAME: JSON.stringify("My app"),
VERSION: JSON.stringify("v0.1"),
}),
new webpack.BannerPlugin({
banner: `
Build Date :: ${new Date().toLocaleString()}
Commit Version :: ${removeNewLine(
childProcess.execSync("git rev-parse --short HEAD")
)}
Auth.name :: ${removeNewLine(
childProcess.execSync("git config user.name")
)}
Auth.email :: ${removeNewLine(
childProcess.execSync("git config user.email")
)}
`,
}),
],
}

postcss.config.js

1
2
3
4
5
6
7
8
9
10
11
12
module.exports = {
plugins: [
[
'postcss-preset-env',
{
browsers: '> 5% in KR, defaults, not IE < 11',
// CSS Grid 활성화 [false, 'autoplace', 'no-autoplace']
autoprefixer: { grid: 'autoplace' },
},
],
],
}


5. 동영상 가이드

Thanks to my team : @Taejoon, @Bareum, @Jiyoung

5.1 동영상 목차

목차 보기
  1. 이디야 프로젝트 클론
  2. NPM 초기화
  3. WEBPACK 설치
  4. WEBPACK.CONFIG.JS 세팅
  5. WEBPACK.CONFIG.JS 수정
  6. CSS-LOADER, STYLE-LOADER 설치 및 세팅
  7. CSS파일 번들링 되는지 확인
  8. 번들링 시 CSS파일로 만들기
  9. CSS파일 정상적으로 빌드되었는지 확인
  10. POSTCSS 설치
  11. POSTCSS 사용 위한 세팅
  12. AUTOPREFIXER 사용위한 준비
  13. AUTOPREFIXER 정상 적용되었는지 확인
  14. +웹팩 추가 플러그인 : CleanWebpackPlugin
  15. +웹팩 추가 플러그인 : HtmlWebpackPlugin
  16. +웹팩 추가 플러그인 : BannerPlugin
  17. +웹팩 추가 플러그인 : DefinePlugin
  18. 최종 결과물 확인