Spark AR 카메라 사용 signal 활용하기
개요
Spark AR을 활용하여 필터를 제작할 때, 사진 촬영이면 비교적 관계가 없겠지만 동영상을 촬영한다고 가정해 보자.
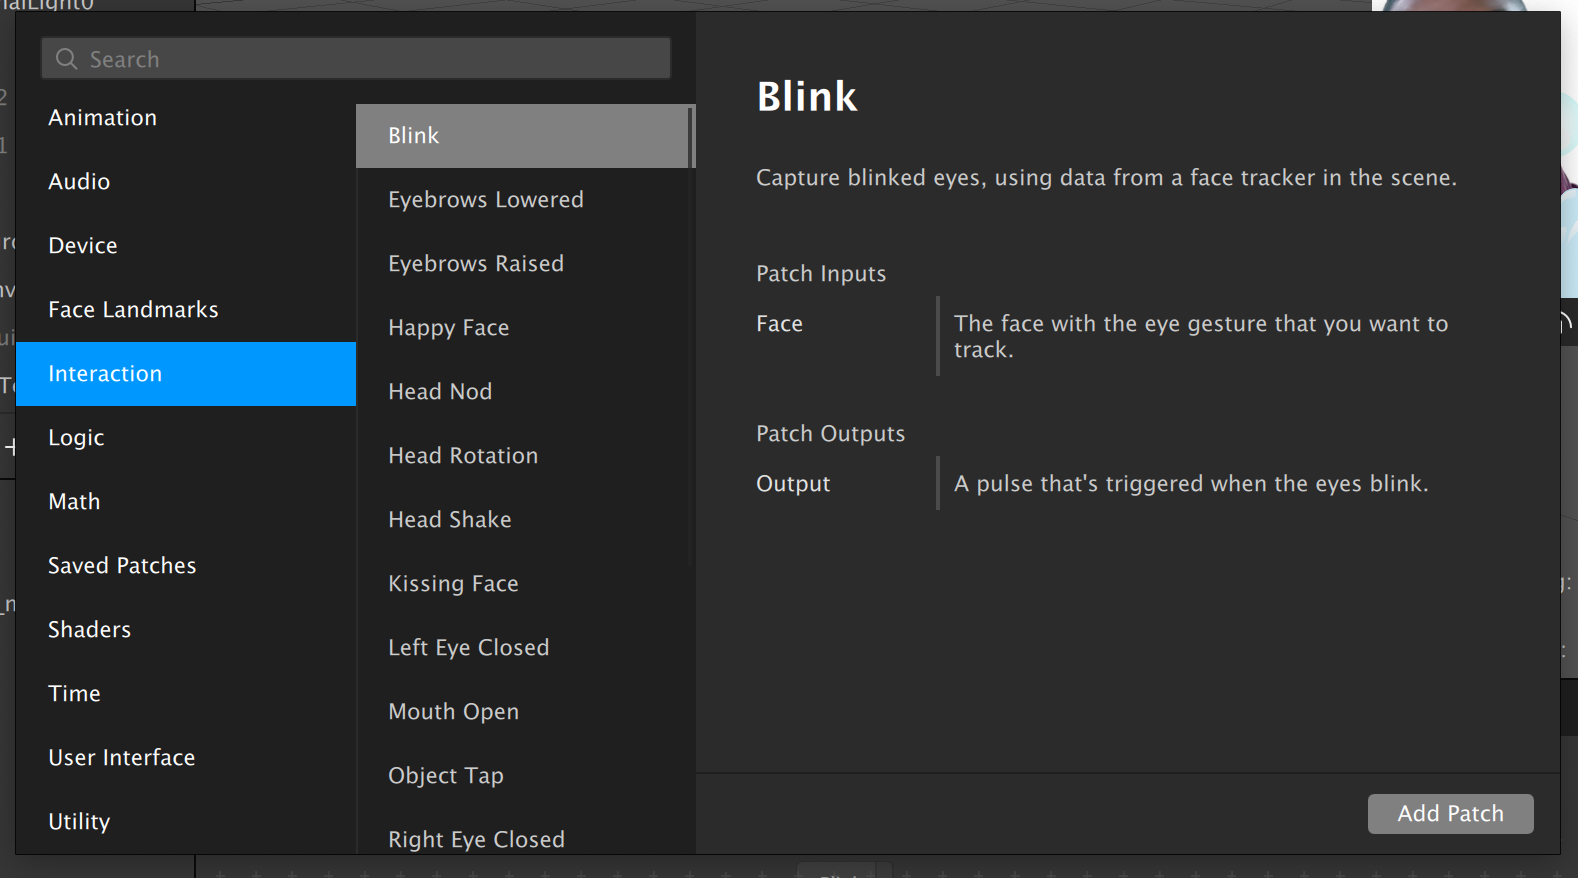
만약 내가 하고 싶은 일이 동영상 촬영이 시작됨과 동시에 준비한 애니메이션을 시작시키고 싶다! 라는 시나리오로 자신감있게 Patch Editor창을 띄웠지만,

위 화면과 함께 어디에서 기능을 찾아야 할지 모를 확률이 높다.내가 모르걸수도…
개발자또는 JavaScript를 알고 있다면 Script Coding을 통해 해결해 보자!👨🏻💻
Spark AR Reference
CameraInfo Module
먼저, Spark AR Learning Center에서 가이드 해주는 사용법은 아래와 같다.
1 | //============================================================================== |
명료하다.
CameraInfo모듈에서 사진을 캡쳐하는 signal closure인 CameraInfo.isCapturingPhoto와 동영상을 촬영하는 signal closure인 CameraInfo.isRecordingVideo를 각각 선언하고
Reactive module의 메서드인 or를 활용하여 둘 중 하나가 true라면 Scene에서 참조한 plane object를 hidden 처리가 되도록 샘플을 구현해 놓았다.
여기서 동영상 촬영시 애니메이션이 동작하도록 구현할 예정이니,
필요한 const isRecordingVideo = CameraInfo.isRecordingVideo만 살포시 챙겨오도록 하자.
Monitor & Subscribe
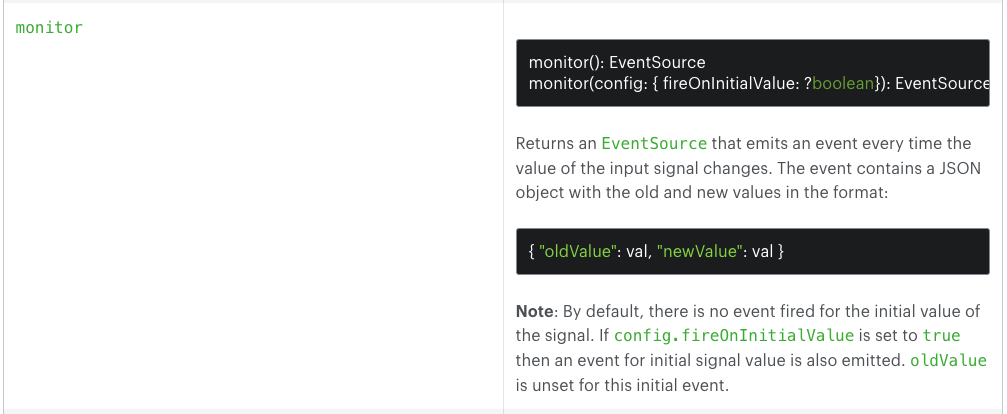
이제 isRecordingVideo의 value가 변화하는 시점에 event를 발생시켜줘야 하는데, 이 역시 Spark AR Learning Center를 잘 뒤져보면(spark ar documentation이 은근 보기 까다롭다..) 아래 첨부된 이미지와 같이 monitor라는 메서드를 발견할 수 있다. 이를 활용한다.

대충 읽어보면, value가 변할 떄, EventSource라는 객체를 던져 준다고 한다.
이제 이 EventSource가 발생할 때 마다 callback을 해주는 메서드인 subscribe 메서드를 이용해 준다.

subscribe 메서드는 RxJs에서 다루는 subscribe와도 유사해 보이는데 상관관계는 공부하고 기회가 된다면 다뤄보자.
구현
이제 준비물을 활용하여, 코드를 짜보면 비교적 간단한 코드가 나옴을 볼 수 있다.
1 | // Check starting recording signal |
결론
나는 위와 같이 구현하여, 동영상 촬영시 애니메이션이 동작되도록 구현하였다.
아마 더 좋은 방식이 있거나 추후 Spark AR이라는 서비스가 deprecated되지 않고 발전한다면 patch를 추가해 줄지도 모른다.
ps. 만약 더 좋은 방식이 있다면 알려주시면 감사드리겠습니다.😇